Introduction
You have found the perfect site if you have been looking for information on the internet about setting up a new Windows server on Amazon EC2. To learn more about how to create an EC2 Instance: Step-by-Step, read on!
Explanation
The Amazon Web Services name for a virtual server is called an EC2 instance. EC2 refers to the “Elastic Compute Cloud”. It’s a web service that lets you request and set up a compute server on the AWS cloud. Amazon Web Services (AWS) provides a service known as “on-demand EC2 instance,” which allows users to rent a virtual server on an hourly basis to deploy their applications.
Several types of instances have various hourly costs. A variety of instance types are available on AWS to accommodate a wide range of business requirements. As a result, you can rent an instance with the exact storage of CPU and memory you need, and keep it for as long as you like. Whenever the instance is no longer required, it can be shut down to prevent further charges.
Steps to Create EC2 Instance
So, you’ve got the information on EC2 and know that there’s a lot you can do with it now that you know the basics. Putting that information to use, though, is what matters. Thus, to understand how to create an EC2 Instance: Step-by-Step, let’s look at the steps required to generate an AMI and launch an EC2 Instance.
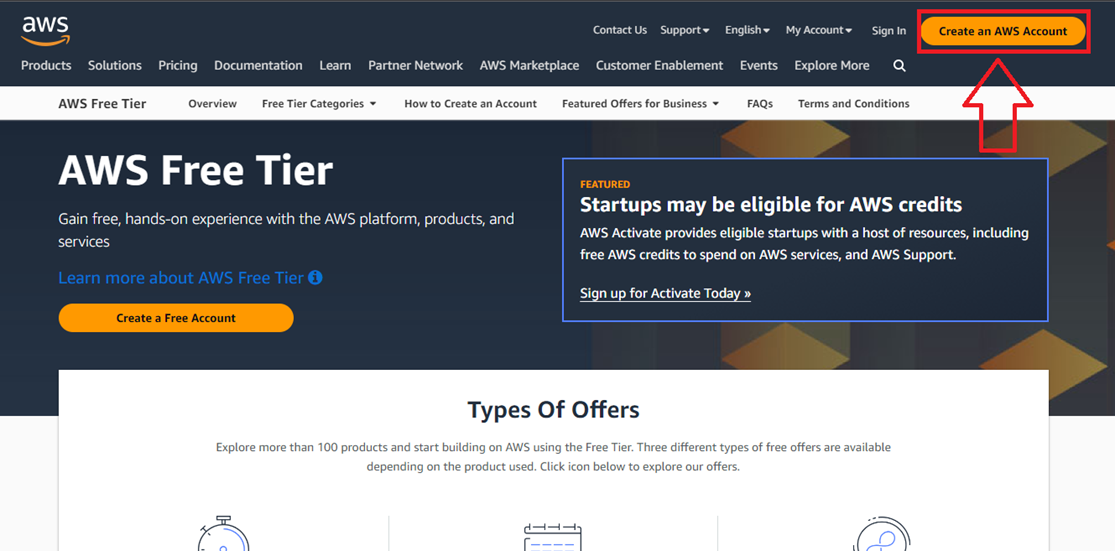
· Create an AWS Account
Access the home page of AWS by clicking on this link https://aws.amazon.com/free/. AWS’s “Sign In to the Console” button can be seen on the main page. Enter your login details in case you have an existing account. If not, you’ll have to create one.
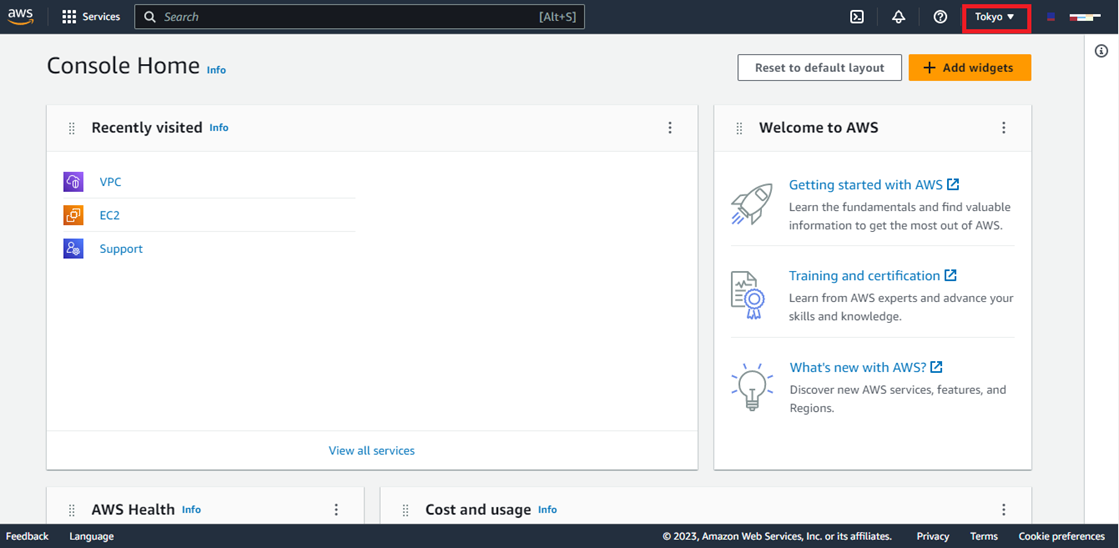
· Select the Region
Selecting an AWS region is a crucial initial step. The AWS Control Panel has a menu at the top where you can make these changes.
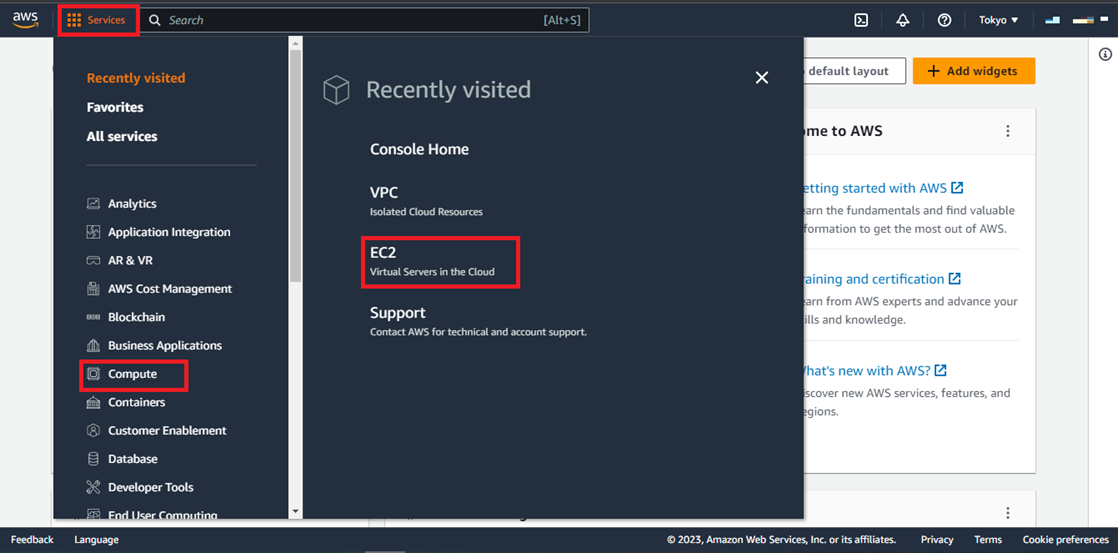
· Navigate to EC2 Console
First, select the “Services” option located at the top left of the screen. Then select “Compute” from the following options. Then, select the EC2 service.
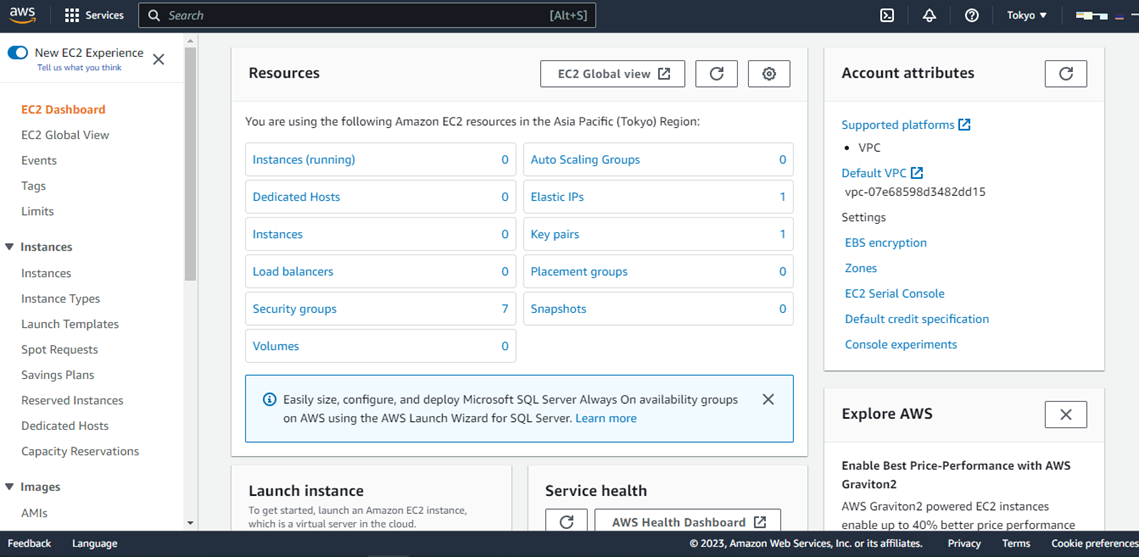
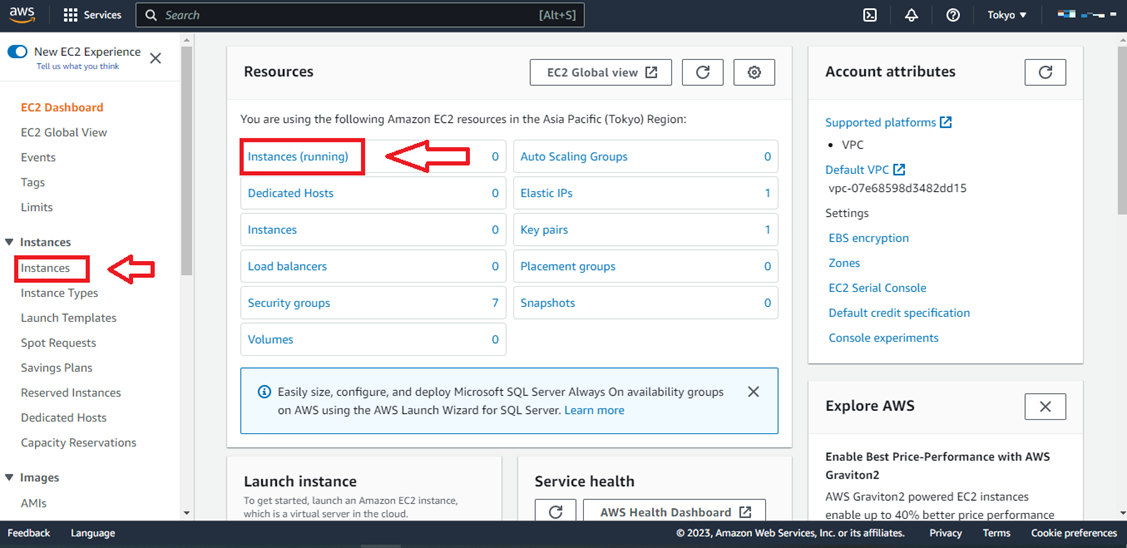
After selecting the EC2 service, the following window with the EC2 dashboard will appear.
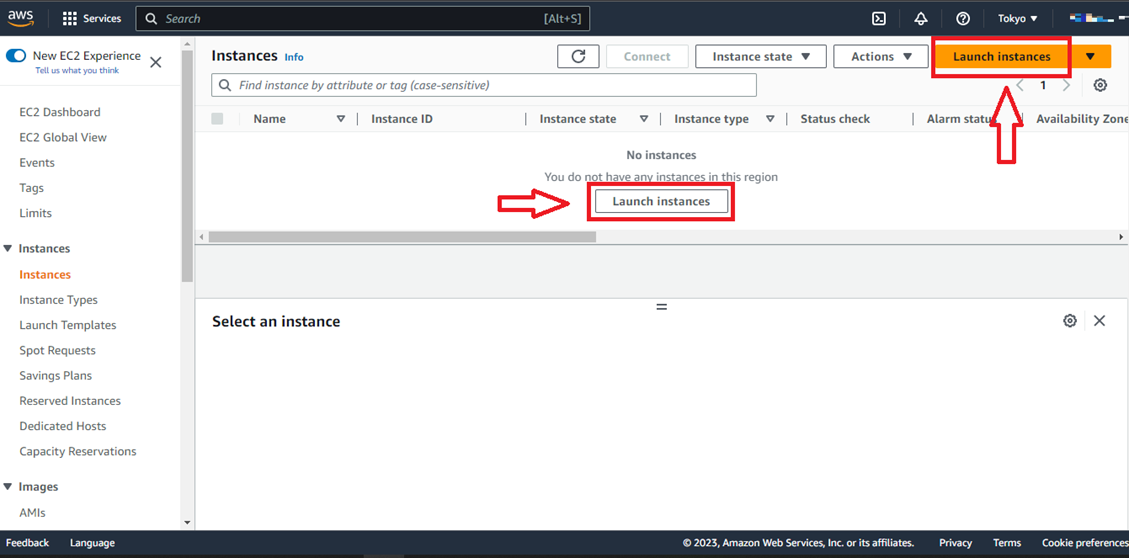
· Create an Instance
Then, click on the “Instances” option. A new window will appear. Then, select the “Launch Instance” option to launch an instance.
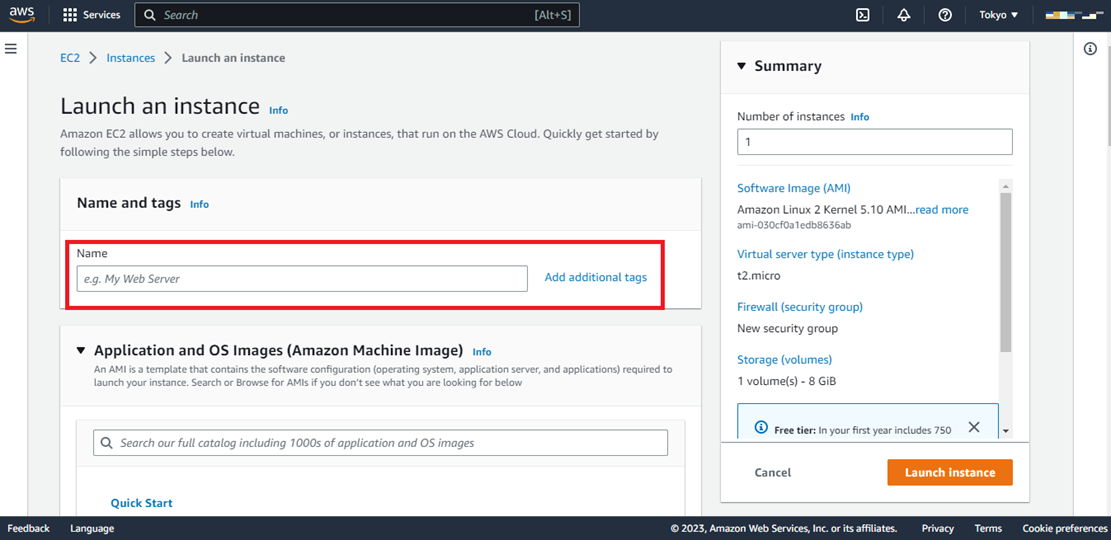
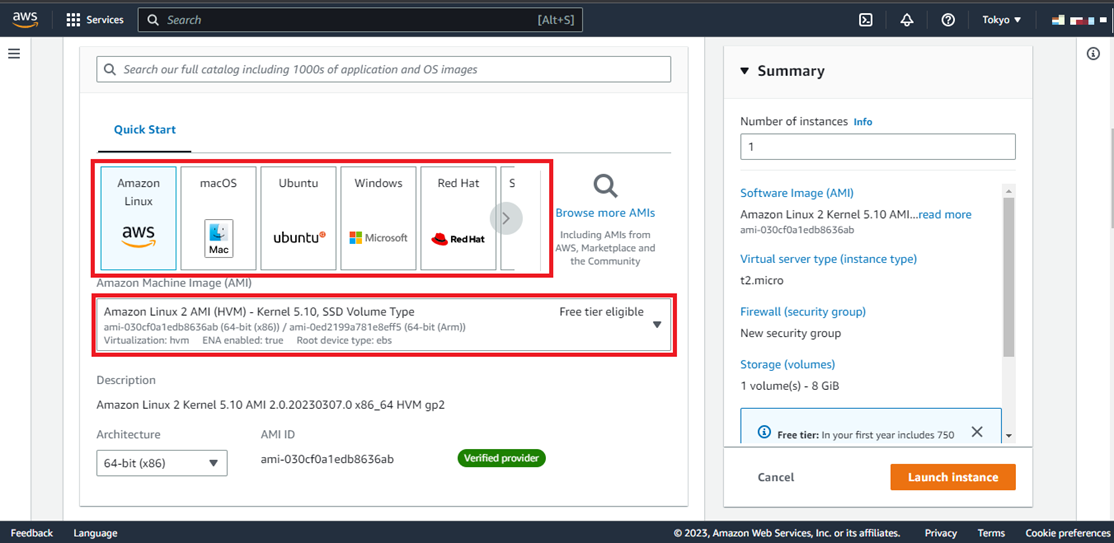
· Give a Specific Name and Choose AMI
After this, give your instance a specific name in a new window. Then, you’ll see a list of Amazon Machine Images (AMI). Select the required AMI and instance type. If you’re a free tier user, then it’ll be recommended that you use free tier-eligible AMI to avoid charges or fees.
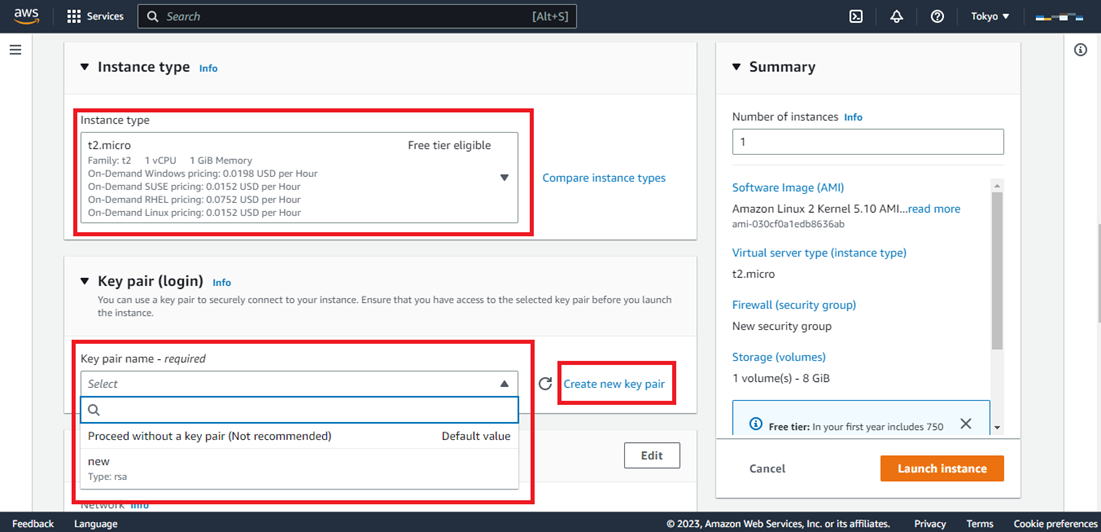
· Choose Instance Type and Setup Login Key Pair
After choosing an AMI, then select the instance type. Always remember if you’re a free tier user, then choose “t2.micro”. If you desire advanced services then you can go with other options. Then, set up a login key pair. If you’ve already created your key pair, then select from the dropdown menu. If not, then select the “Create new key pair” option. This key pair will always be required whenever you create an instance.
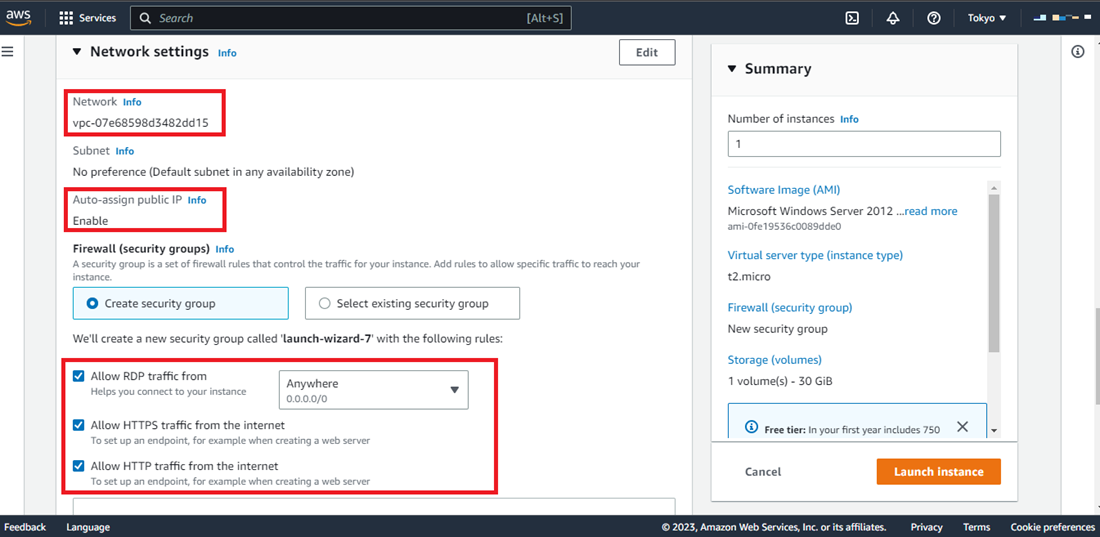
· Configure Instance Details
In this step, you’ll see a VPC (Virtual Private Cloud). It is by default connected to your instance when created. Then, keep your subnet in any availability zone and it is also by default. Then, enable all options like RDP (Remote Desktop Protocol), HTTP, and HTTPS. In this way, your instance becomes public and you can access it through the web.
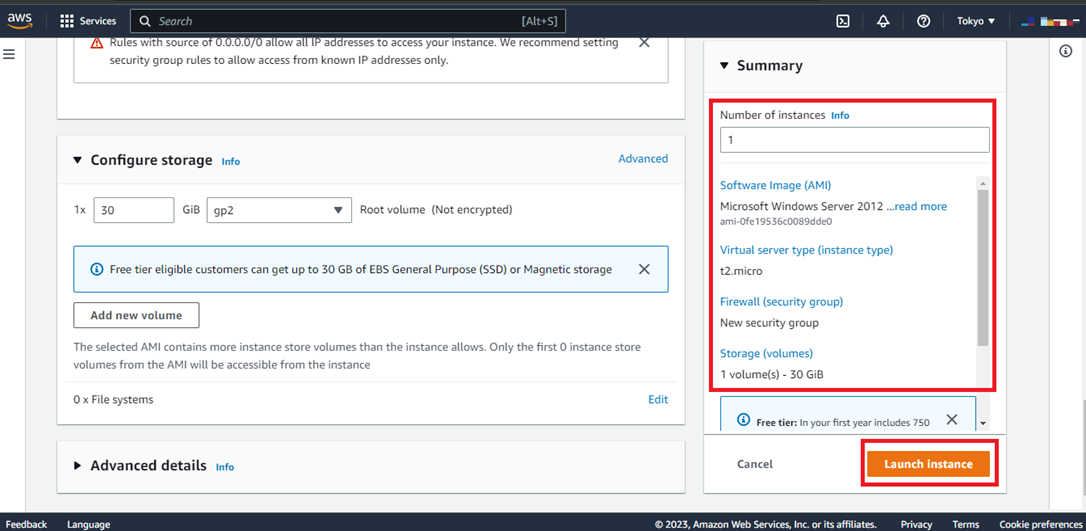
· Configure Storage
Here you can see that a 30GB General Purpose SSD root storage has been provisioned for the instance automatically. You can increase or decrease your storage volume by clicking on the “Add new volume” option.

· Review your Instance
In this step, review your instance parameters carefully and then click on the “Launch Instance” option located below.
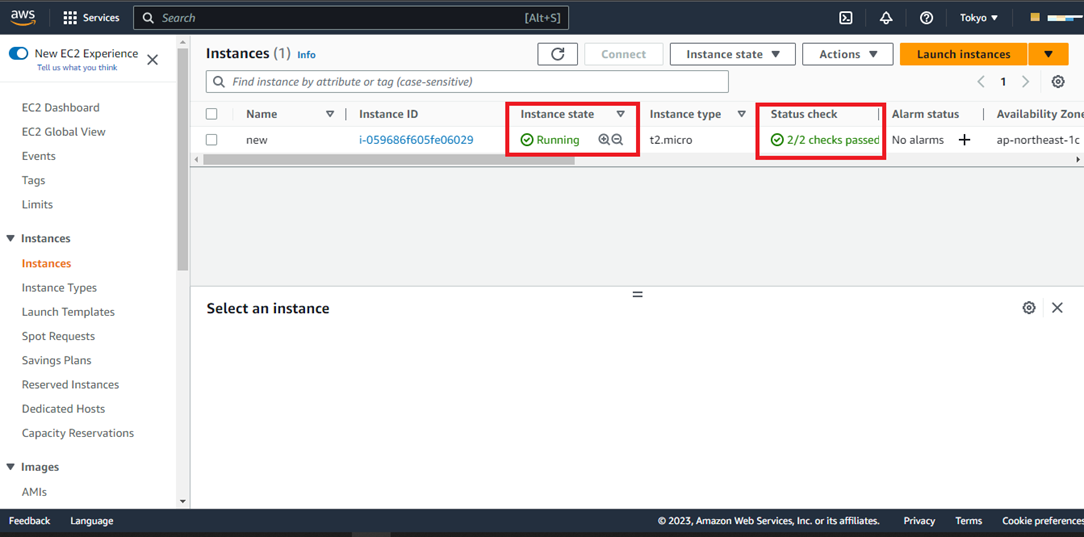
· Check Instance Status
After launching an instance, check your instance state. First of all, it’ll go in a pending state but after some time it’ll be ready to run properly. Also, check your “Status Check” option. Firstly, it’ll be in the initialization phase but after a moment, it’ll be in the “2/2 checks passed” state.
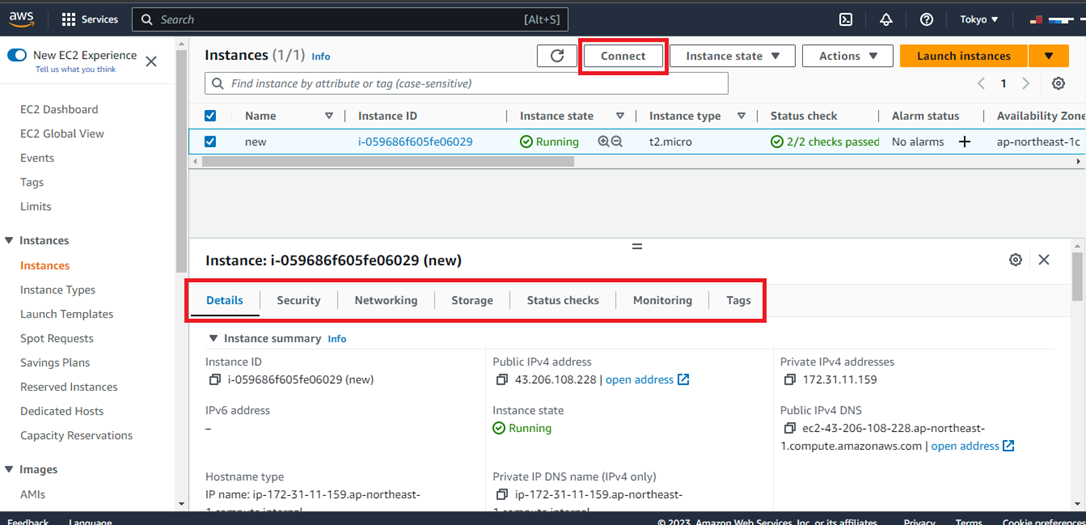
· Connect your Instance
In this step, when you select your instance, you’ll see the details of your instance below. So now, let’s connect this instance. When you click on the “Connect” option, you’ll see a window where you’ll ask to download a remote desktop file. So, download this file and click on the “Get Password” option.

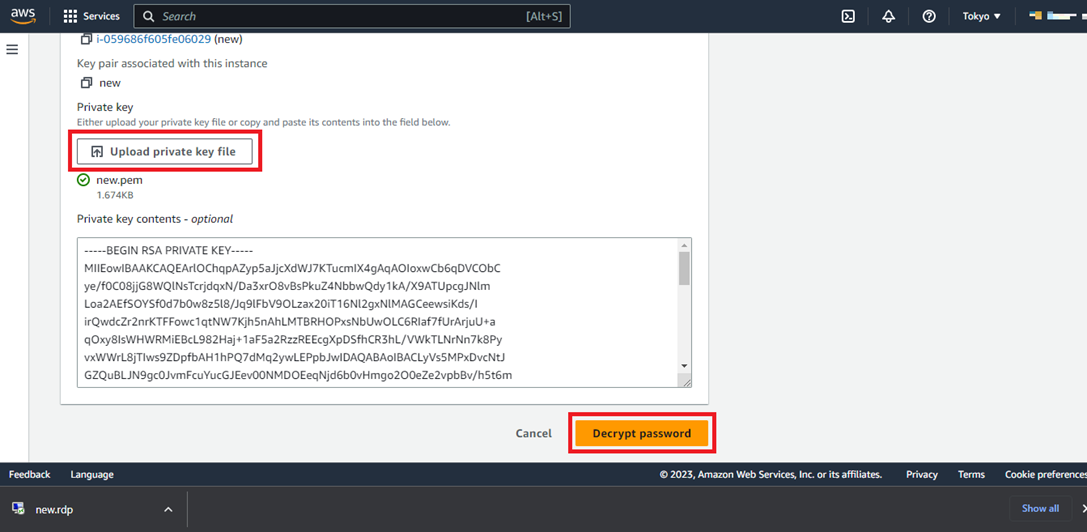
After this, you’ll be asked to upload your private key pair. So, upload it and click on the “Decrypt Password” option.
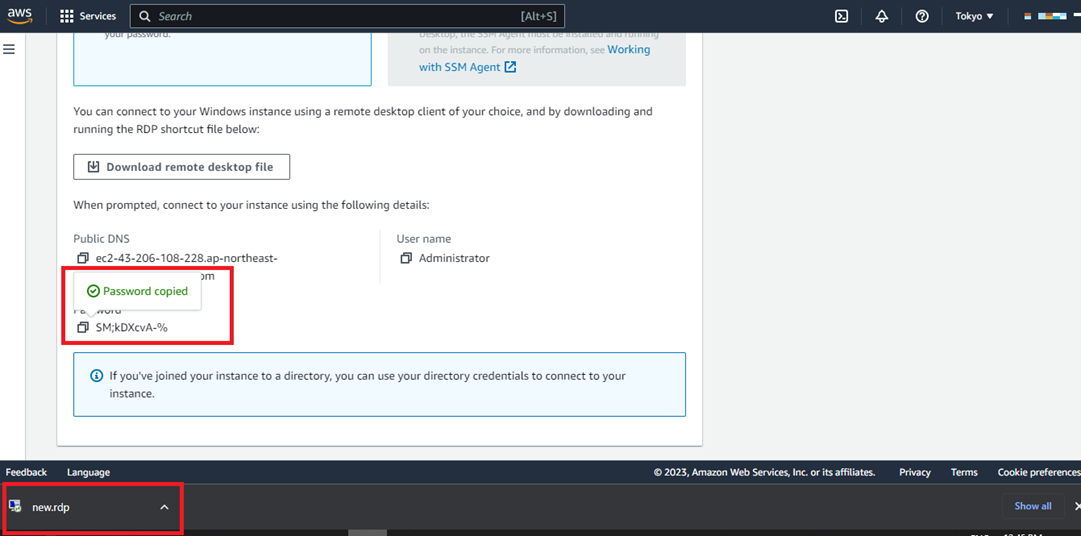
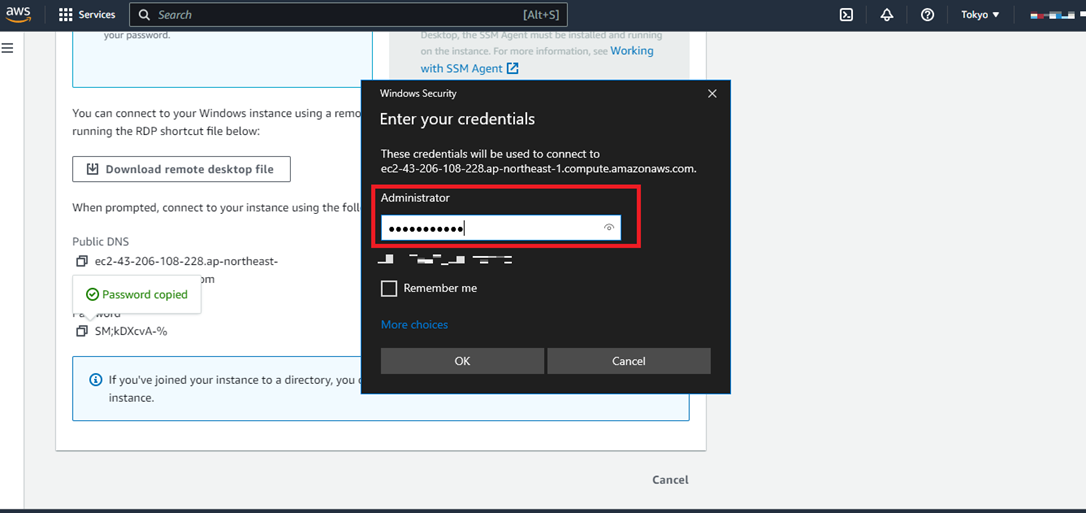
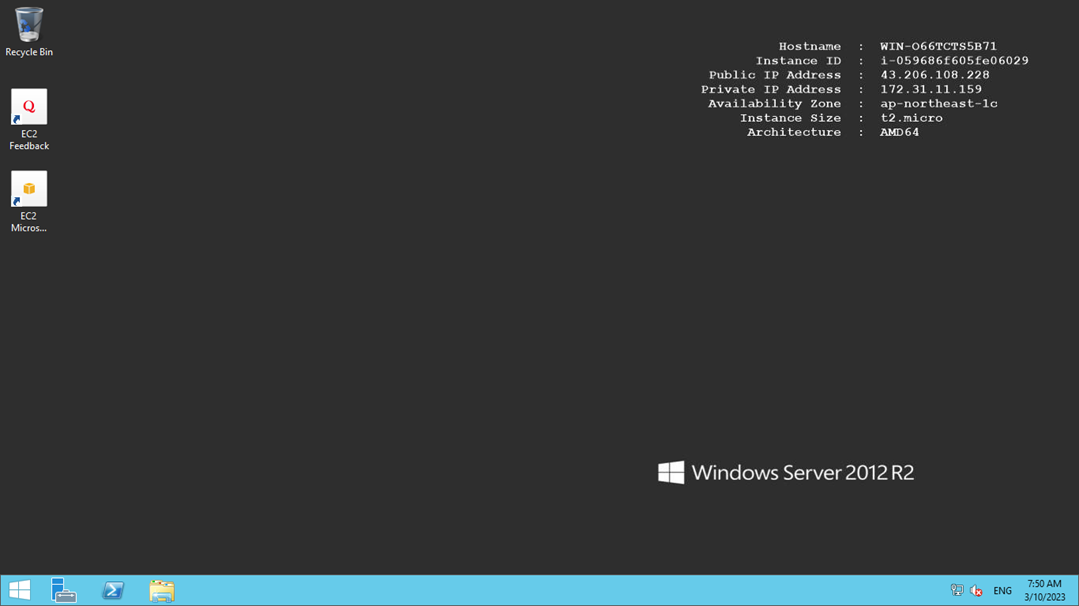
Now copy your password and open the downloaded RDP file located below by clicking on it. And enter the password by allowing the necessary permissions. Then, press OK. You’ll then see your virtually created instance.
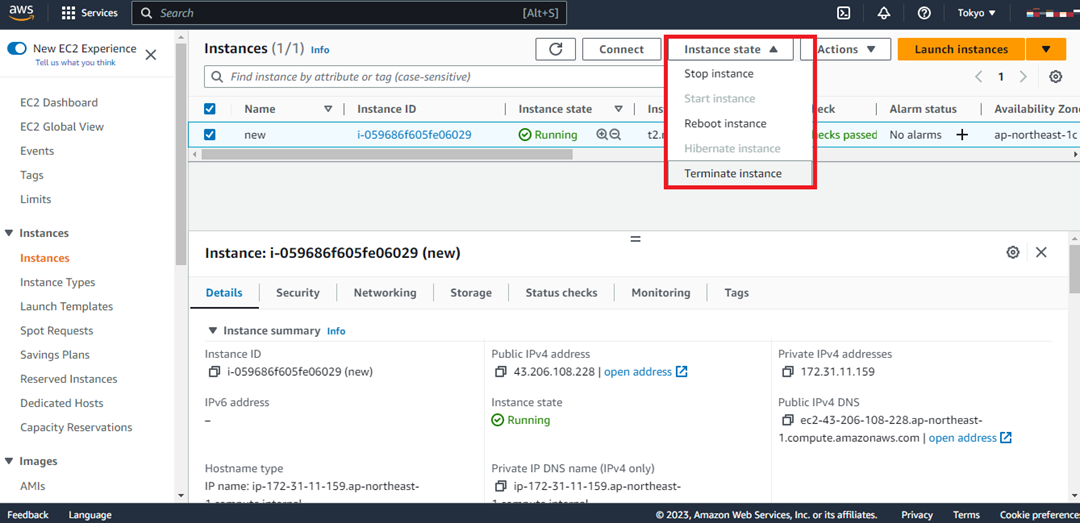
· Stop or Terminate an Instance
Whenever you’re done with an instance, it’s a good option to shut it down. Choose “Instance state,” in the Amazon EC2 console to either pause or terminate the instance. You’d stop the instance if you want to use it again. It is recommended to terminate the instance if it will not be used again.
Conclusion
In short, this article on how to create an EC2 Instance: Step-by-Step, will help you in creating an EC2 instance easily. As it is an on-demand instance, keep your instances terminated if they’re not in use otherwise AWS will charge you a fee for this. Thanks for reading.